This guide explains how to add a contact under an existing customer account and prepare the contact for portal and notification use.
Before you begin: Confirm that the customer account already exists and that you have permission to manage contacts. The example below uses approved sample data from the AIOS 360 demo tenant.
Open the customer contacts screen
- Open Customers from the Main Menu.
- Open the customer record you want to manage.
- Select Contacts from the customer sidebar.
- Select + New Contact.
Complete the contact details
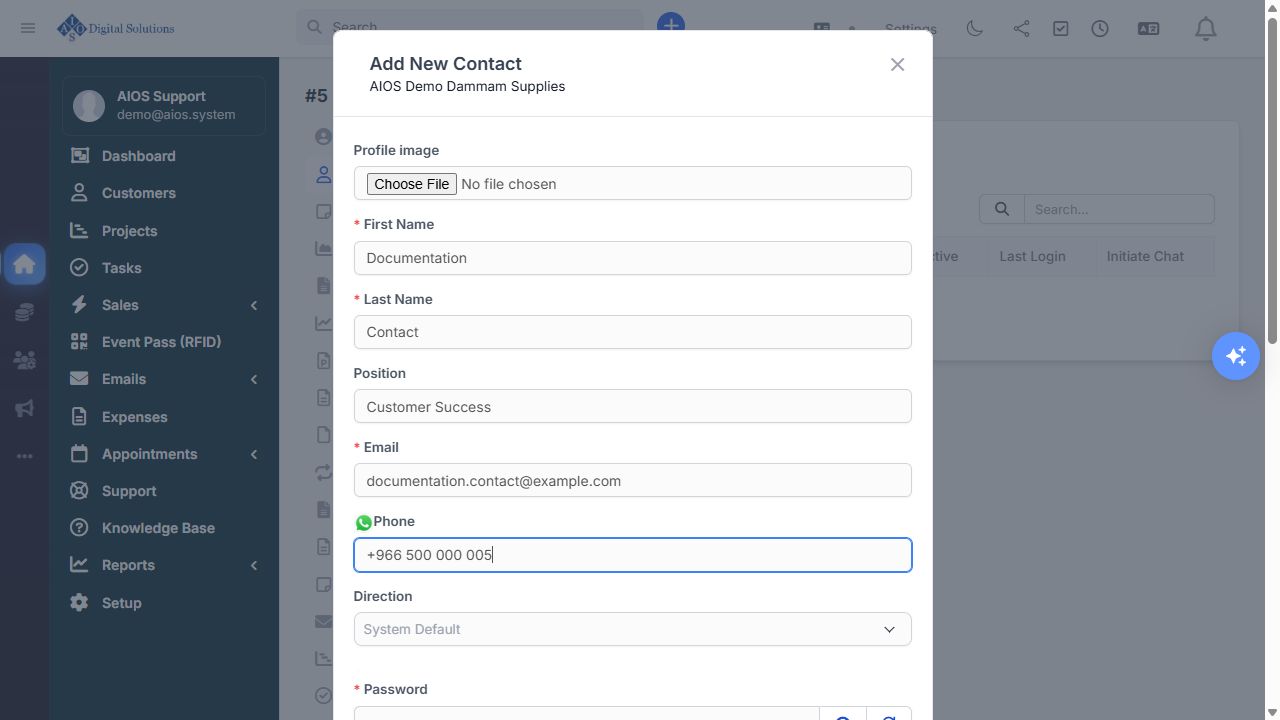
Sample creation view: enter the contact name, position, email, phone, language direction, and password. The password is intentionally blank in the documentation image.
Required information
- Enter First Name and Last Name.
- Use a unique Email address for the contact.
- Set the Position and phone number when your team needs them for communication.
- Choose Direction only when the contact should use a specific language direction; otherwise keep System Default.
- Set a strong temporary password according to your organization’s policy, or use the available password-set email workflow.
Primary contact and notifications
Keep Primary Contact enabled only when this person should be the main contact for the customer. Review the welcome-email and set-password options before saving:
- Do not send welcome email prevents the initial welcome message.
- Send SET password email lets the contact establish their own password when supported.
Review permissions
Review the contact permissions shown below the form, including invoices, estimates, contracts, proposals, support, projects, and email notifications. Grant only the areas this contact needs for their role.
Save and verify
- Select Save.
- Confirm the contact appears in the customer’s Contacts list.
- Use Edit to correct details or adjust permissions later.
- Test portal access only after the contact’s email and notification settings have been reviewed.
Common questions
The email is already in use
Each contact must use a unique email address. Check existing contacts before saving and use a company-approved address.
The contact should not receive an invitation
Enable Do not send welcome email and confirm that Send SET password email is not selected.
The contact can see too much
Open the contact again and reduce permissions to the minimum needed for the role.
