Create a customer record before preparing sales documents or setting up a customer project. This guide explains how to enter company details, choose account preferences, and prepare billing and shipping information.
Before you begin: You need permission to create customers. Menu names, required fields, and available options may vary with your company configuration. The screenshots use the AIOS 360 demo tenant and sample data.
Open the customer form
- Select the Main Menu workspace.
- Open Customers and search for the company first to avoid creating a duplicate.
- Select New Customer.
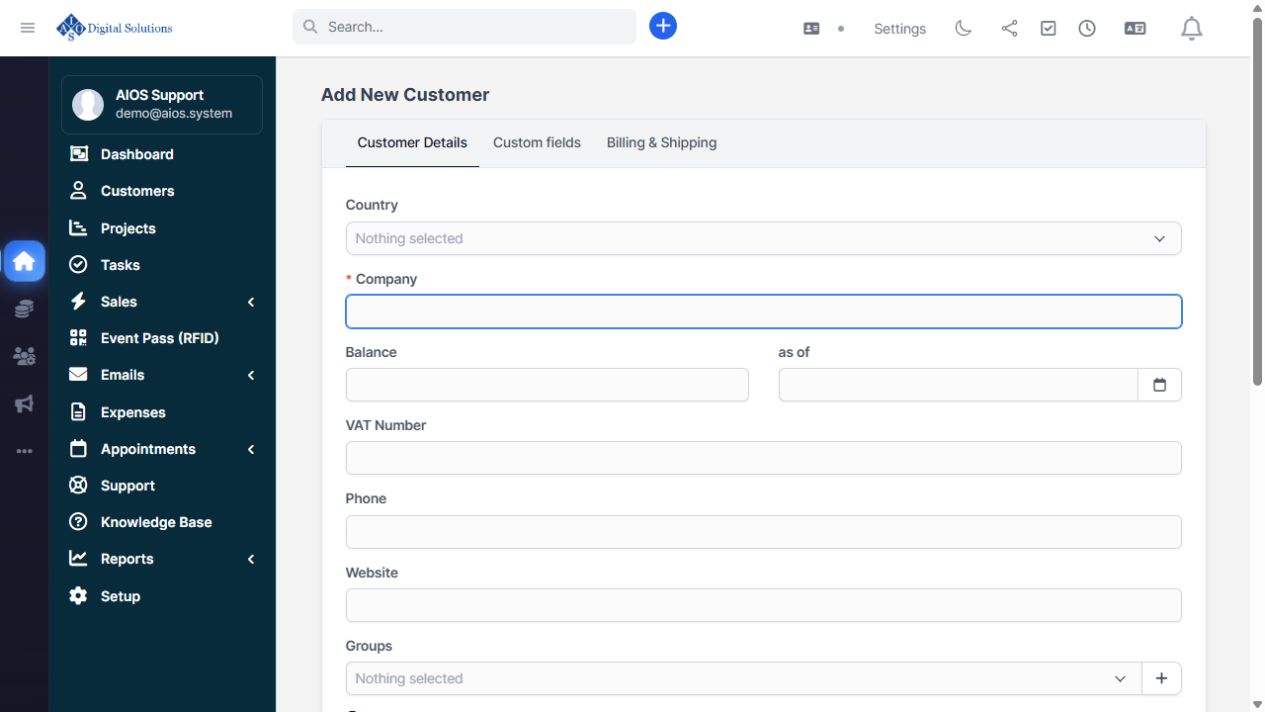
Customer Details tab: company identity, contact information, account preferences, and address.
Enter the customer details
Company and contact information
- Enter the Company name and complete required fields marked with an asterisk.
- Choose the Country and enter the address, city, state, and ZIP code where applicable.
- Add the phone number, website, and VAT number if relevant to the customer.
- Select one or more Groups if your company uses them to organize customers.
Important: If the form includes an opening Balance and an as of date, use only values approved by your finance team. Do not enter an estimated balance.
Currency, language, and customer-specific fields
Review Currency and Default Language. Choose customer-specific values when appropriate, or retain System Default.
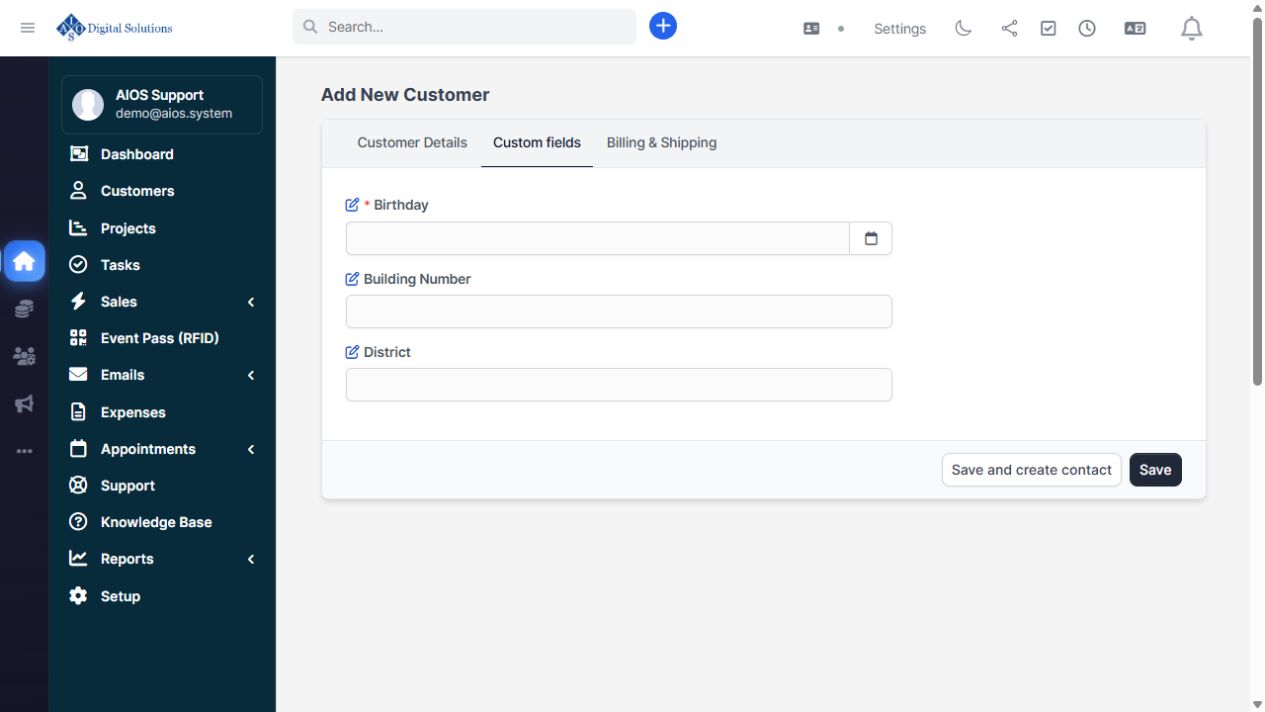
Custom fields tab: complete any additional fields required by your organization, such as Birthday, Building Number, or District.
Prepare billing and shipping addresses
- Open the Billing & Shipping tab.
- Enter the billing address, or select Same as Customer Info when the details should match.
- Enter a separate shipping address if needed. Use Copy Billing Address only when both addresses are the same.
- Review the country and address details before saving.
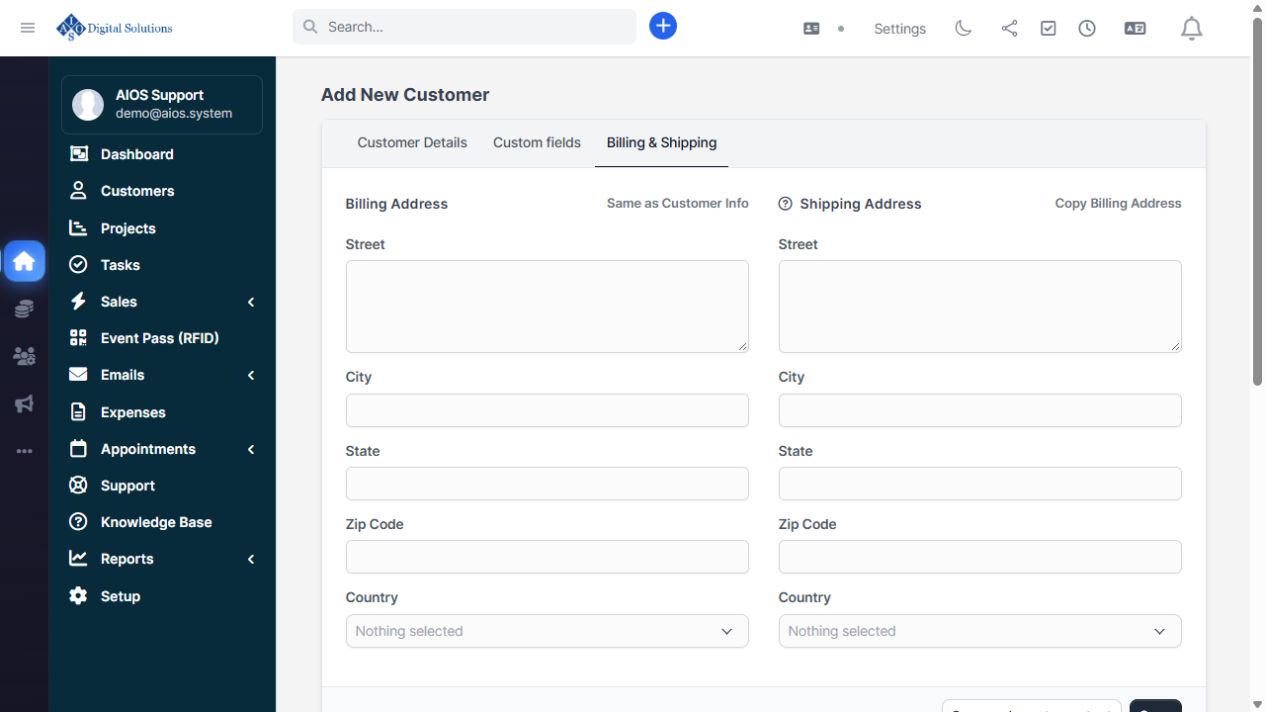
Billing & Shipping tab: maintain separate billing and shipping addresses or copy the billing address when appropriate.
Save and verify the customer
- Select Save to save the customer, or Save and create contact to continue with a contact form.
- Confirm that the customer record opens successfully and that the company details are correct.
- Return to Customers and search for the new record if you need to find it again.
Customer versus contact: The customer record represents the company or account. A contact represents an individual associated with that customer. Review portal-access and notification settings before inviting a contact.
Common questions
I cannot see New Customer
Confirm that you are in the correct workspace. If the button is still unavailable, ask your administrator to review your customer permissions.
The form will not save
Look for highlighted validation messages, complete all required fields, and check any company-specific custom fields. Avoid repeatedly submitting the form; first check whether the customer was already created.
Next steps
Review Customers: Overview, Filters, and Bulk Actions to learn how to search, filter, export, and process customer records in batches.
If you need help with customer setup, contact support@aios.digital and include the field name and any error message, without sharing passwords or sensitive customer information.
