Create a project to organize customer work, set a schedule, and bring the responsible team members together. Before saving, review project settings so customer visibility and notifications match your agreed delivery process.
Before you begin: The customer should already exist, and your account must have permission to create projects. Available fields and tabs may vary by enabled modules and company settings. This guide uses the AIOS 360 demo form.
Open the project form
- Select the Main Menu workspace.
- Open Projects and check whether the project already exists.
- Select New Project.
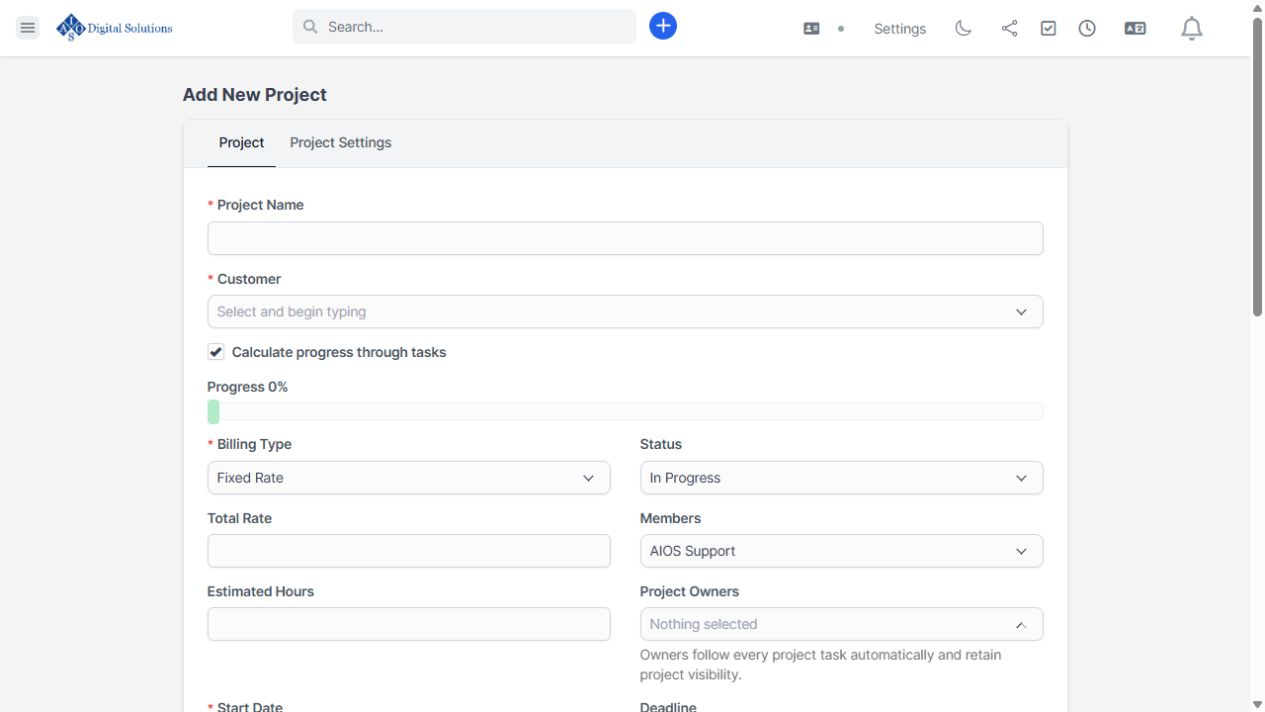
Project tab: customer, billing type, status, dates, team members, owners, and description.
Define the project
- Enter a clear Project Name, such as a service name and delivery period.
- Select the Customer. Begin typing in the selector to find the correct account.
- Review Status. Choose the stage that reflects the actual work.
- Set the Start Date and, when agreed, the Deadline.
- Add a description of the scope, expected deliverables, and important exclusions.
Choose the billing basis
The form offers Fixed Rate, Project Hours, and Task Hours. Select the option that matches the approved customer agreement, then complete the rate fields shown for that option. Confirm the choice with your project or finance lead if you are unsure.
Assign the team and track progress
Select the required Members. If Project Owners is available, review its help text: owners follow project tasks automatically and retain project visibility. Assign only people who should have that responsibility.
Review Calculate progress through tasks. Keep it enabled when progress should be based on project tasks; otherwise review the progress controls provided by your setup. Add Estimated Hours and Tags if your team uses them.
Review customer access and notifications
- Open Project Settings.
- Review Send contacts notifications. Choices include all eligible contacts, specific contacts, or no notifications.
- Review Visible Tabs and the individual customer permissions below it.
- Allow only the access intended for this project. Check tasks, comments, attachments, files, finance information, timesheets, and activity visibility carefully.
- Return to the Project tab and review Send project created email before saving.
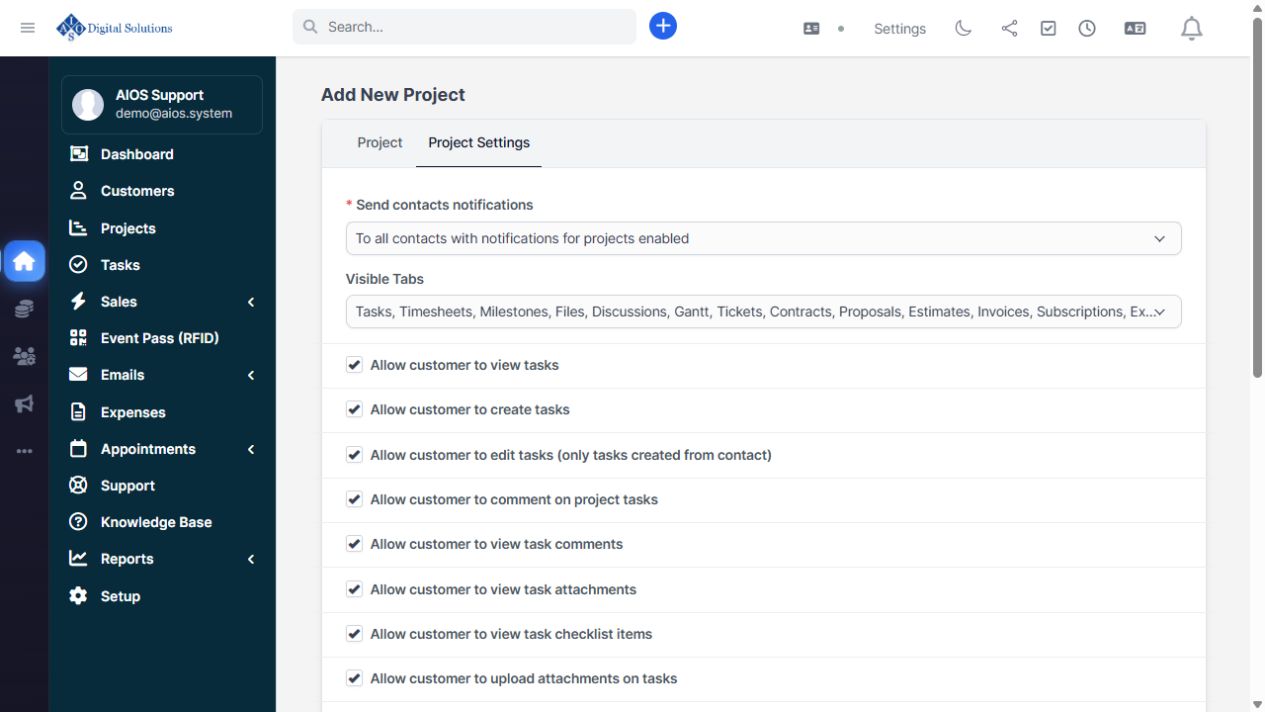
Project Settings tab: control notifications, visible customer tabs, and the permissions that govern customer access.
Important: A visible tab and a customer permission are separate settings. Review both. Do not enable broad access or notifications simply to make the project easier to find.
Save and verify
- Review the customer, required fields, dates, billing basis, team, and access settings.
- Select Save.
- Confirm that the new project opens and that its details are correct.
- Return to Projects and use search or Filters to find it again.
Before sharing the project with a customer, have an authorized team member confirm that customer-facing access matches your intended settings.
Common questions
The customer is not listed
Begin typing the customer name, check the spelling, and confirm that the account already exists. If access is restricted, ask your administrator to review your permissions.
I cannot see New Project
Confirm that you are in the correct workspace and ask your administrator whether your account has project-creation permission.
The form reports a validation error
Complete every field marked with an asterisk and follow the message beside the affected field. Check that the deadline is consistent with the planned start date.
Related guidance
- Need to create the customer first? Read Create a Customer and Prepare Billing Details.
- For workspace navigation, see Getting Started: Navigating AIOS 360.
