Use leads to record enquiries and organize potential customers before they become customer accounts. A well-maintained lead helps your team understand who to contact, where the enquiry came from, and who is responsible for the next step.
Before you begin: You need access to Leads and permission to create records. Statuses, sources, assigned users, and additional fields depend on your company configuration.
Open a new lead
- Select the Main Menu workspace.
- Expand Sales and open Leads.
- Search for the person or company to check whether a lead already exists.
- Select New Lead.
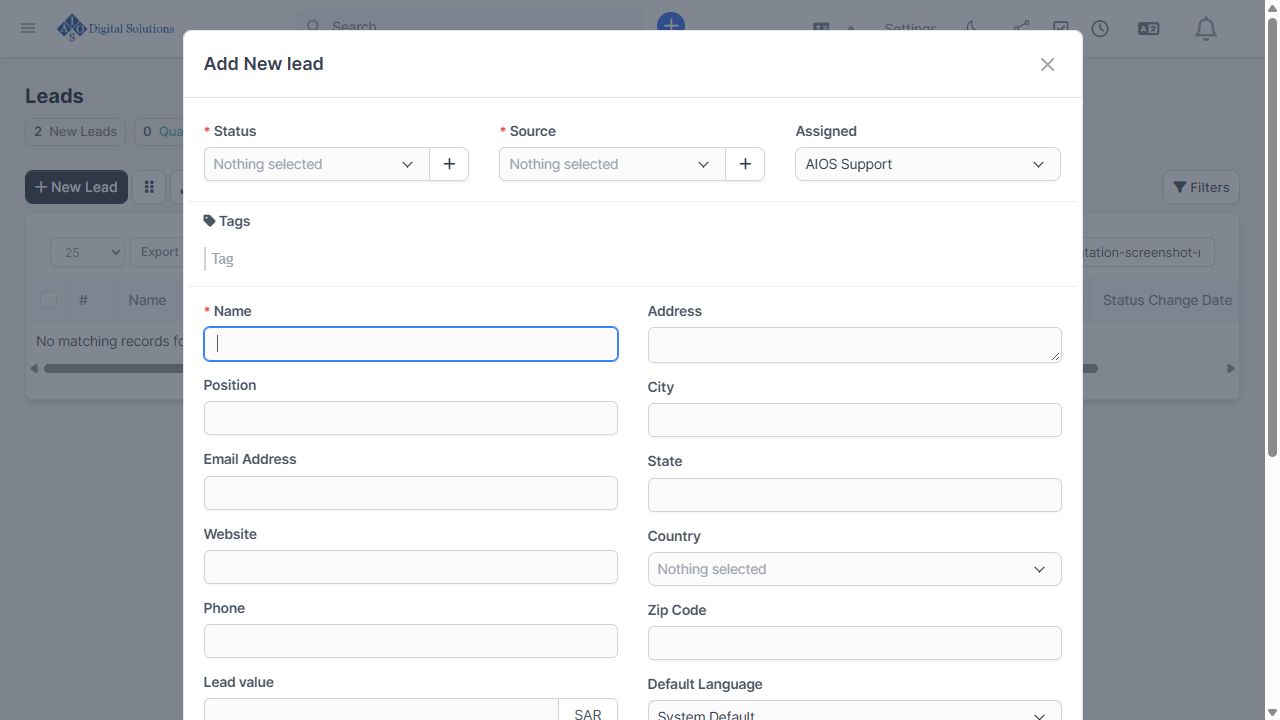
Complete the essential information
- Choose the Status that matches the current stage of the enquiry.
- Choose the Source that describes how the enquiry reached your business.
- Enter the lead Name.
- Review Assigned and select the team member responsible for follow-up, where permitted.
Tip: Use the existing status and source values agreed by your team. Ask an administrator if a required option is missing instead of creating inconsistent categories.
Add useful contact details
Complete the available email address, phone number, position, company, website, and address fields. Include an international country code for phone numbers where appropriate. Choose the default language if your company uses language-specific communication.
Record context for the next conversation
Use Description to summarize the enquiry and the agreed next step. Use Tags consistently to make related enquiries easier to identify. If you use Lead value, enter the estimated opportunity value according to your sales process and check the currency shown beside the field.
Review visibility and contact history
- Public: Review this option carefully. It can broaden internal access to the lead; leave it unchecked unless your team intends that visibility.
- Contacted Today: Check it only if the lead was actually contacted today. Review the default selection before saving.
Do not include passwords, payment-card details, or unnecessary sensitive information in a lead description.
Save and find the lead
- Select Save after reviewing the required fields.
- Confirm that the saved record shows the correct status, source, and assigned owner.
- Return to Leads and use the search box or Filters to locate the record.
- Keep the lead information current as your team follows up.
Common questions
Status or Source is empty
Select an available value before saving. If no suitable options are available, ask your administrator to review the setup.
I cannot find the lead after saving
Clear any active filters, search by the name you entered, and confirm that you are in the correct company account. If another team member owns the lead, your permissions may affect visibility. Check before creating a duplicate.
Should I create a lead or a customer?
Use a lead for a prospect or enquiry. Create a customer account when the relationship is ready for your customer workflow, following your company process.
Related guidance
Read Create a Customer and Prepare Billing Details or revisit Getting Started: Navigating AIOS 360.
